Quick Filters provide an easy way to find and display records that meet a specific defined criteria. They are included on Entry Forms and Browse Forms (normally the ones with the word Browse in the name). The functionality is different for each form type.
At the top of each Entry Form you will find a a Quick Filter control similar to the one show below:

You can select one of the pre-defined filters from the drop down list, or you can enter a search expression followed by Enter or Tab. When entering a search expression it will be applied using specific rules that may be different for each form. You can always enter a document id or document number to immediately show the corresponding document. Many forms implement additional, more advanced, search capabilities. Any advanced features are explained in the context help topic for the individual form.
Browse Forms include a Quick Filter and Filter Bar at the top of each form. These work together to provide advanced, customizable filter capabilities.

You can select an existing quick filter using the drop down, or you can use the Filter Bar to define a new filter. (The Filter Bar is the green row located above the column headers.) When you select an existing quick filter the search criteria will be displayed in the Filter Bar and the grid will be immediately updated to show any matching records. The buttons to the right of the filter box provide the following functions:
| Function | Description |
|---|---|
| Query | Click this button to apply the current filter. If you have not changed the filter then this will refresh the current list of records to include any new data in the database. |
| Clear | Clears the Filter Bar. This button does NOT immediately query. Use this to clear the board whenever you are ready to start a new filter. |
| Manage | Displays the Filter Manager dialog box where you can rename, delete and share your previously saved filters. |
| Save | Displays the Save Filter dialog box where you can name your filter and choose whether to share it with others. |
| ? | Displays a tooltip the resulting SQL statement that will be sent to the database when you click Query. |
| Top N |
Tip: You can also set a default Top N value for all forms from the User Settings popup in the FOURA Navigator.
The Top N value is the maximum number of records that will be returned when you click Query. Increase this value if you need to return more records at one time, but keep in mind that larger values will require more memory. Setting the Top N to 0 will return all matching records. |
The Filter Bar is where you enter your filters as described in the Filter Syntax topic. Each column includes its own filter area located just above the column header. If you enter filters in multiple columns then all the filters will be combined.
The current filters will be applied when you click Query. To start a new filter click the Clear button.
Once you have created and tested your filter you can save it to the database. When you click the Save button the following dialog box will appear:
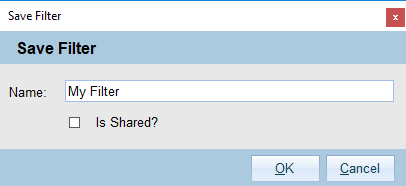
Enter a name for your filter and decide whether you want the to share the filter or keep it private. The name must be unique among all filters defined for that current form. If another user has already created a filter with the same name then you will need to select a different name. If you enter a name that is the same as one of your own filters then FOURA will confirm that you want to overwrite your existing filter. Shared filters can be used by anyone who can use the form
When you are ready click OK to save your filter or Cancel to return to close this dialog without saving.
The Filter Manager will help you rename or delete your filters, and share them with other users. When you click the Manage button a dialog box similar to the following will appear:
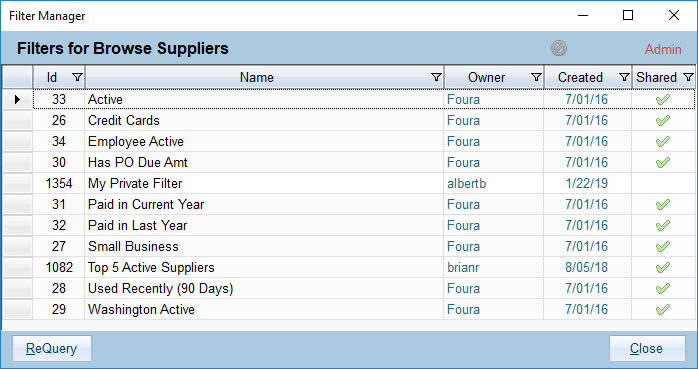
Each existing filter will be displayed. If you are the owner then the filter will appear with a white background, otherwise the background will be light gray. You can do the following actions for filters that you own:
| Action | Description |
|---|---|
| Change Filter Name | Click on the existing name and overtype it with the new name. |
| Share Filter | Check the Shared check box. Shared filters can be used by any FOURA user. Uncheck the Shared check box to make the filter private. |
| Delete Filter | Click on the row header to select one or more rows, then click the Delete button in the header or press the Delete key on the keyboard. |
